Frame-A-Face
Online Help Pages
- Frame-A-Face Interface
- Original Image Preview
- Menu File
- Menu Edit
- Menu Presets
- Crop Guides Menu
- Menu View
- Menu Help
- Crop Setup Panel
- Presets In Details
- Templated Export
- Workflow Automation
- Preferences: General
- Preferences: Presets
- Preferences: Automation
- Register Program
- Customised Workflow
Manage Presets
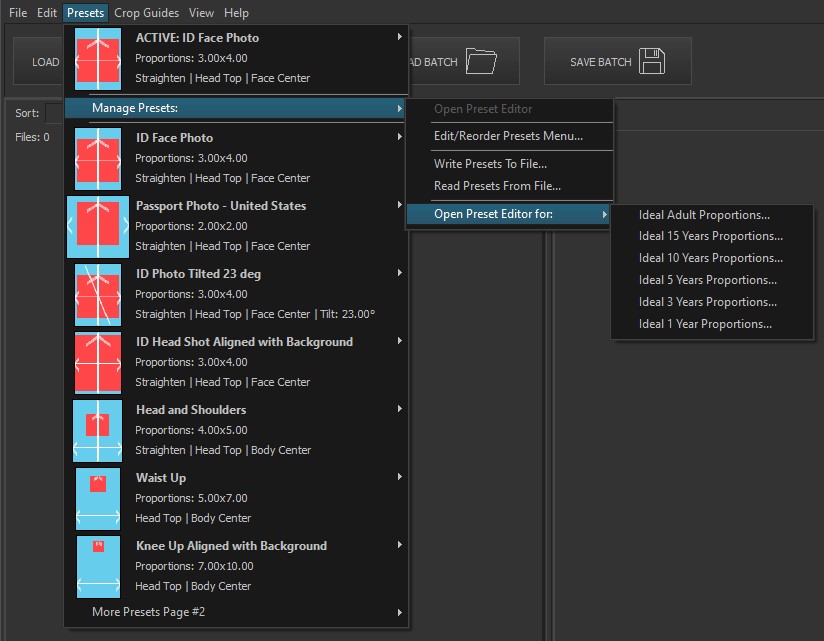
The Manage Presets menu allows you to customize and organize your presets for better workflow efficiency.
Options
Open Preset Editor: Opens the Crop Setup Panel and displays the currently open image cropped with the active preset. Here, you can edit the preset and either modify it or save it as a new preset. This option is active only when you have already opened an image and selected one. If no images are open, you can use the Crop Setup Panel with a sample drawing by selecting Open Preset Editor For from the menu below.
Edit/Reorder Presets Menu…: Opens the Edit Presets Menu panel, where you can organize your presets by editing their names, reordering them, removing unnecessary ones, or adding new presets to make your work more convenient.
Write Presets To File: Exports presets as a plain text file. You can manually edit this text file in any text editor to modify or rename existing presets, create new presets, remove unnecessary ones, and sort presets in a more suitable order. See Presets In Details for more information.
Read Presets From File: Imports presets from a plain text file. This option replaces all existing presets with those in the file. If you want to edit only one preset, you need to export all presets, edit the one you want, and then import the edited file. Alternatively, you can visually edit a single preset with the Crop Setup Panel by selecting the Open Preset Editor option above. If you want to append saved presets to the current set of presets, you can do that in the Edit Presets Menu panel. Use the [ … ] button to open the Append Presets from File… option.
Open Preset Editor For: Opens the Crop Setup Panel with a drawing that depicts human figures with ideal proportions for different ages.