Frame-A-Face
Online Help Pages
- Frame-A-Face Interface
- Original Image Preview
- Menu File
- Menu Edit
- Menu Presets
- Crop Guides Menu
- Menu View
- Menu Help
- Crop Setup Panel
- Presets In Details
- Templated Export
- Workflow Automation
- Preferences: General
- Preferences: Presets
- Preferences: Automation
- Register Program
- Customised Workflow
Frame-A-Face Interface
Here is the main window of the Frame-A-Face program.
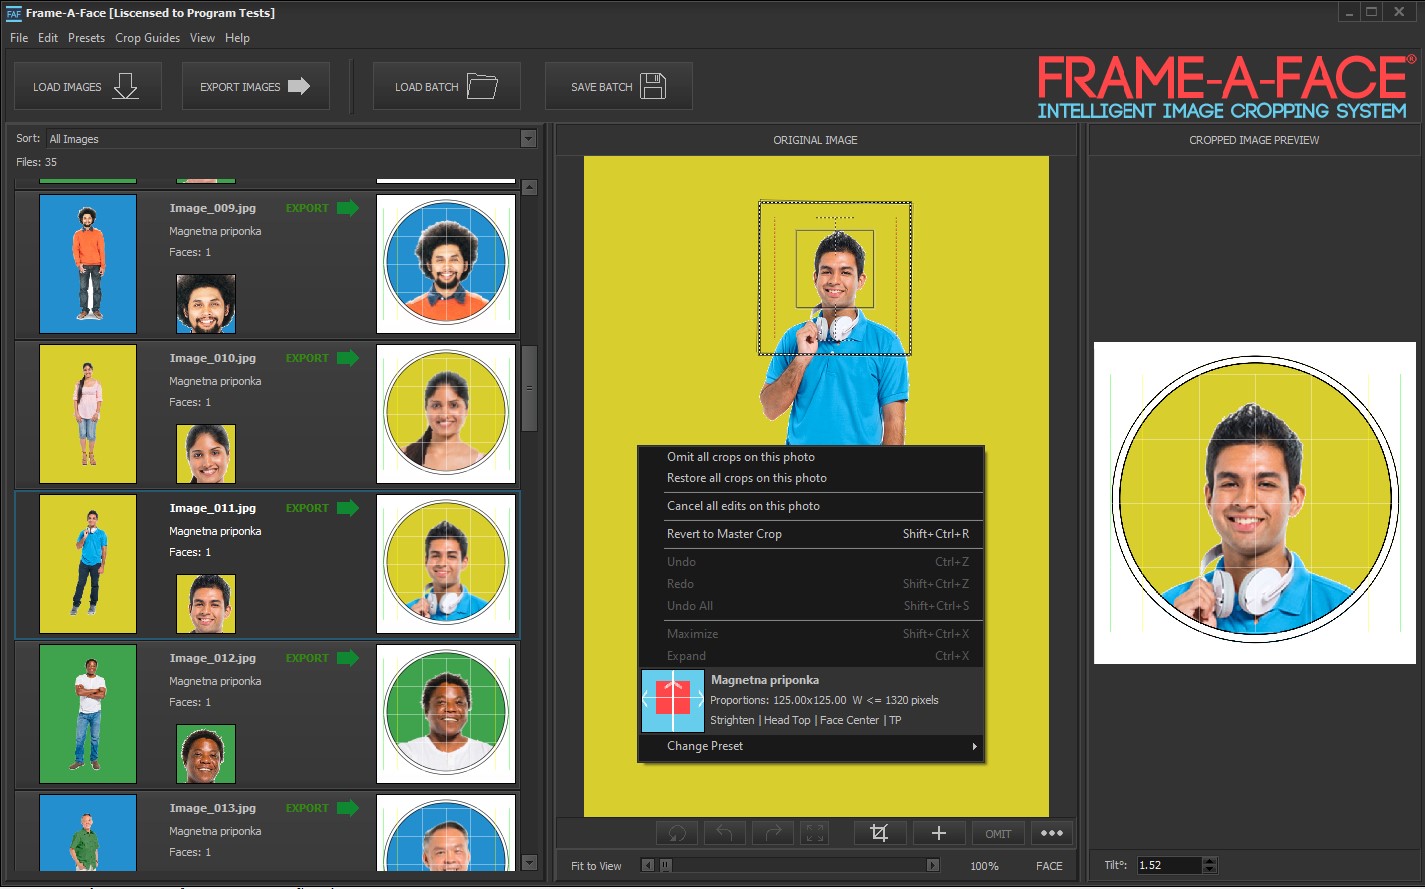
The interface includes a file list on the left panel, original image preview with a crop box in the middle, and a preview of the crop on the right panel.
After you open a folder with files and the program scans images and detects faces, you will see a list of file items in the file list on the left.
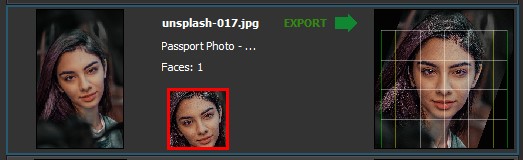
Usually, if everything goes well, you will see items like this:
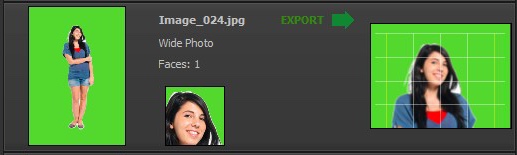
If the program detects more than one face in the image, all detected faces are shown as small square pictures in the middle of the item.
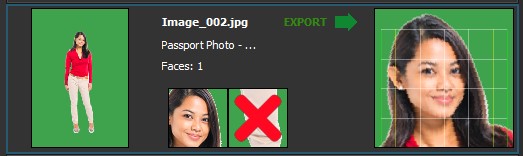
If it is a false detection, or if you don’t need a photo of a particular person, you can click on the detected face to delete it. The deleted face is marked with a red X. To undelete the face, click on it again.
If no face is detected, the list item looks like this:
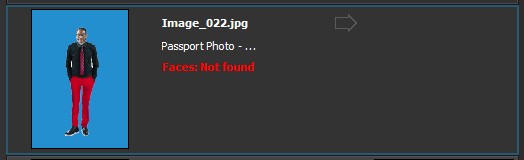
Here, you may add a face manually. Use the + button or select Add Crop from the Edit Menu.

This turns the mouse cursor into a +, allowing you to draw a new face over the open photo in the middle view panel. Start by pointing your mouse between the eyes of the new face and drag the mouse to the bottom of the jawline. The program will use these two points to define the face. If the straighten function is enabled, the face will be straightened by these points.
Use the button beside it to add a new preset or modify the current one.

This opens the Crop Setup Panel.
If some of your photos have subjects located off-center, or if the current preset does not fit well for the photo, it may happen that the cropping box is oversized and overextends the image border. These crops are marked with red borders.
Please see the help section about oversize to learn more.
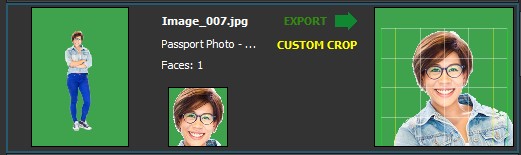
One way to deal with oversizing is to correct the crop box manually. Select the crop box with your mouse and use the drag handles to adjust its position. After any manual adjustment, the item gets a Manual Crop status.
If, in future work, you apply a different preset to all images in the current job, the program will ask for your permission to change these Manual Crop images.
Above the file list, there is a drop-down menu that helps you review large jobs by filtering images with different peculiarities.
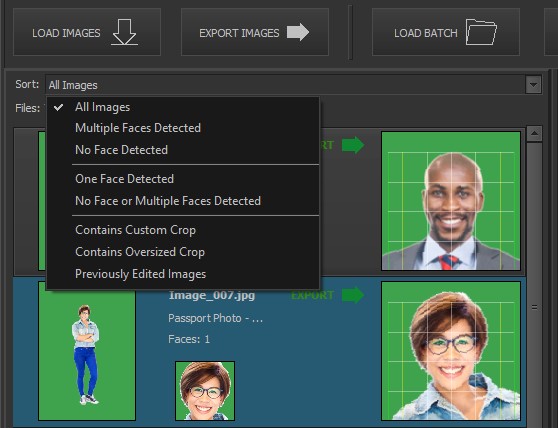
All Images - To display all opened files.
Multiple Faces Detected - Displays images where more than one face was detected.
No Face Detected - Displays photos where the program did not find any faces.
One Face Detected - Lists images with only one face, i.e., normal photos if you work with individual photo portraits.
No Face or Multiple Faces Detected - If you work with individual photo portraits, both no found face and multiple faces may indicate a problem.
Contains Custom Crop - Displays images with custom edited crop boxes.
Contains Oversized Crop - Displays images with oversized, overextended crop borders.
Previously Edited Images - Displays images with manually added faces and custom edited crop boxes.