Frame-A-Face for macOS
Online Help Pages
- Frame-A-Face Interface
- Original Image Preview
- Menu Frame-A-Face
- Menu File
- Menu Presets
- Menu View
- Menu Help
- Crop Setup Panel
- Edit Presets Menu
- Presets In Details
- Workflow Automation
- Settings
- Register Program
- Customised Workflow
Presets with Masks
This type of preset allows you to produce composite images, such as calendars, photos with decorative borders, or, as shown in the example below, images in a circular shape.
You can create these kinds of presets by editing the preset lines in a text file manually.
Here are the lines you need to edit:
OutputPixelWidth:<NNN> // Fixed output width (Integer value)
…
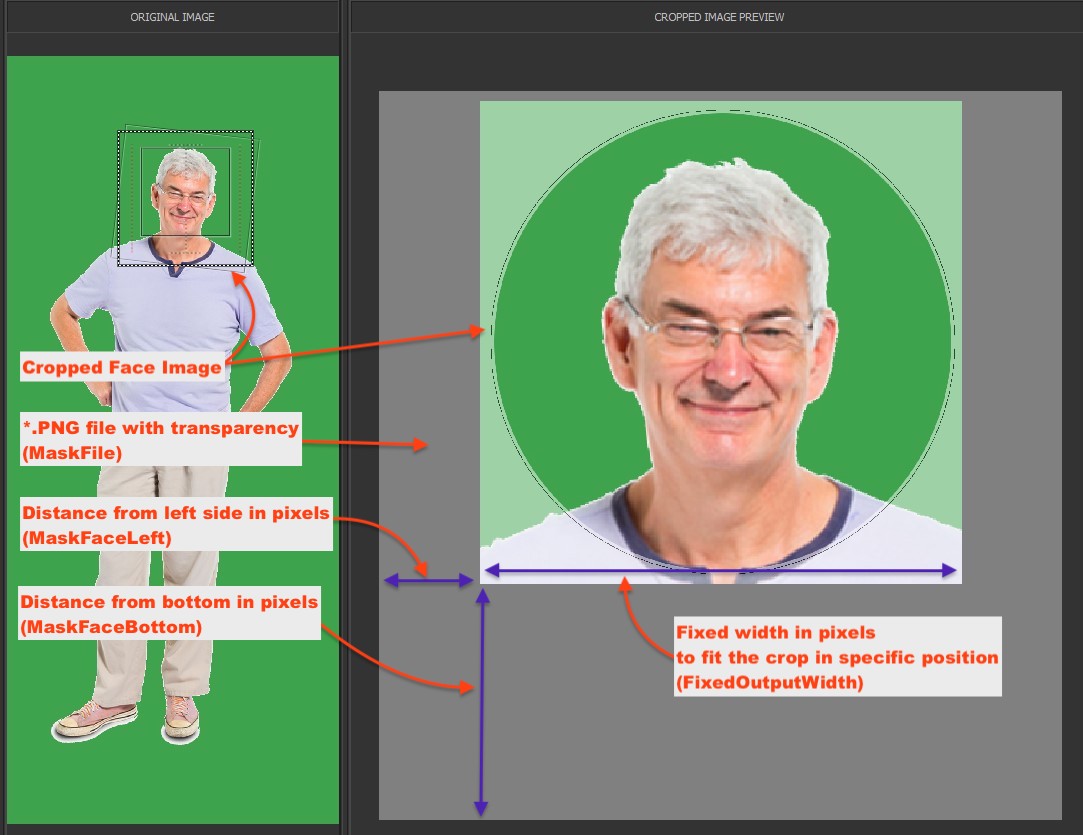
MaskFile:<Name of file> // Path and Name of overlay mask file
MaskFaceLeft:<NNN> // Distance (pixels) from left side of mask to left of inserted image
MaskFaceBottom:<NNN> // Distance (pixels) from bottom of mask to bottom of inserted image
MaskFile: This is the full path to a mask image. The mask image should be a .png file with transparent areas. The cropped image is placed under the mask and will be visible through the transparent “holes.” In our example images, the mask is a white rectangle with a circular transparent hole outlined with a thin black line. After the program is installed, you have one such mask built into the program’s bundle. You can use it as a model when creating your own masks.
NOTE: There is a default preset named Round Magnet that contains the following text line:
MaskFile:"magnet.png"
The magnet.png file is located inside the application bundle and is included for example purposes only. When you create your own masked presets, this line must contain the full file path and will look like this:
MaskFile:"/Users/<your name>/folder/another folder/your file.png"
MaskFaceLeft: This is the distance in pixels from the left side of the mask to the left side of the cropped picture.
MaskFaceBottom: This is the distance in pixels from the bottom of the mask to the bottom of the cropped picture.
OutputPixelWidth: You should explicitly set the width of the cropped image. Set it so that the cropped image under the mask fills the entire transparent area.
NOTE: In the case of masked presets, the output size of the exported image is defined by the size of the mask file. The exported images will be the same size as the .png file used as the mask.
Below are some examples of images with a masked preset. Please bear in mind that extra alignment options can make the masked pictures more uniform and consistent.
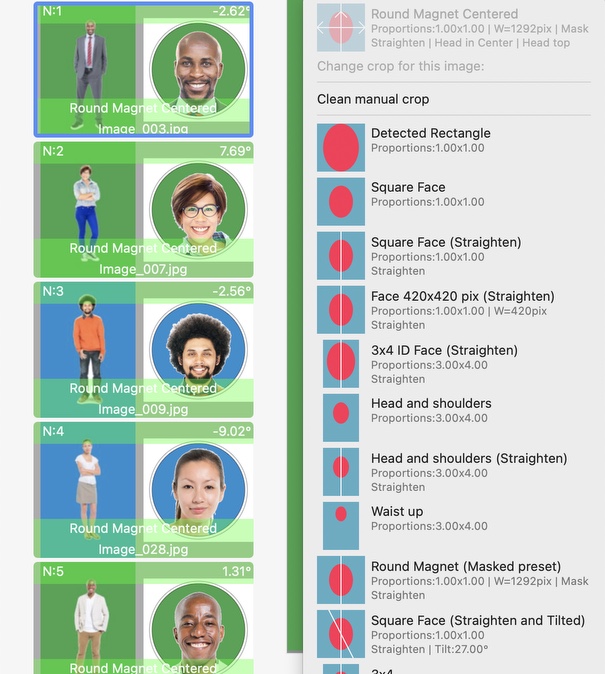
Masked preset aligned by head and head top
![]()
![]()