Frame-A-Face for macOS
Online Help Pages
- Frame-A-Face Interface
- Original Image Preview
- Menu Frame-A-Face
- Menu File
- Menu Presets
- Menu View
- Menu Help
- Crop Setup Panel
- Edit Presets Menu
- Presets In Details
- Workflow Automation
- Settings
- Register Program
- Customised Workflow
Original Image Preview
This is the middle panel of the Frame-A-Face program.
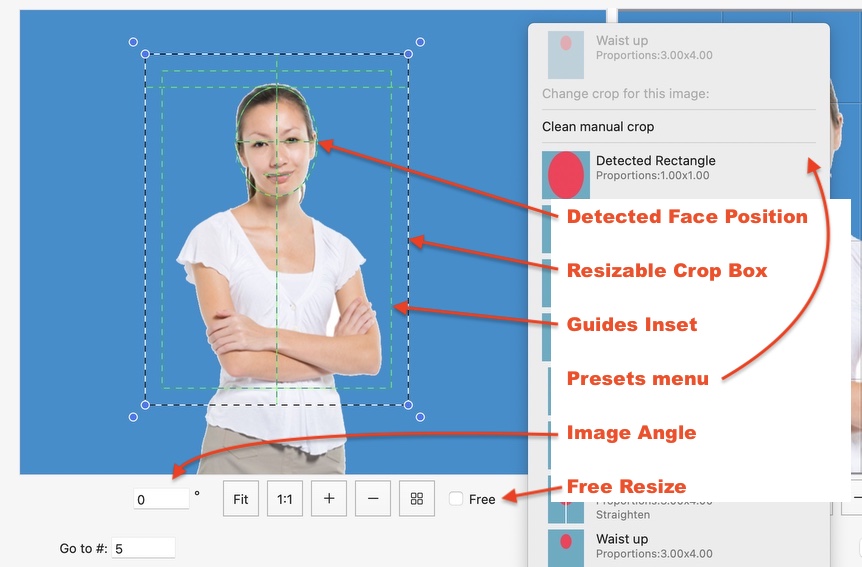
Detected Face Position - A dotted green oval outline around the face indicates its position.
Resizable Crop Box - The program draws a black-and-white dotted border around the detected face according to the active preset’s parameters. You can select and resize this crop box manually. When you resize the border using your mouse, it scales with the face center as the center of scaling. If you want to resize the crop border out of proportion, enable the Free checkbox below. You can drag the blue dots outside the border to rotate the image. The face center remains the center of rotation. After resizing the box, the image receives a Custom Crop status.
Guides Inset - This is a dotted rectangle inside the black-and-white dotted border. Adjust the Guides Inset size in pixels in the Crop Setup panel.
Presets Menu - Right-clicking on the image preview opens a menu where you can select a new crop preset for the currently open image. If you change the preset manually, the image receives a Custom Crop status.
A disabled top bar in the menu shows the currently used preset.
Below are crop edit controls:
 Angle - A text box with the angle value in degrees. This value reflects the angle that was automatically applied by the straighten or tilt option or by manual rotation with the mouse. You can also edit or correct the picture rotation directly in the text box. The face center is the center of the rotation.
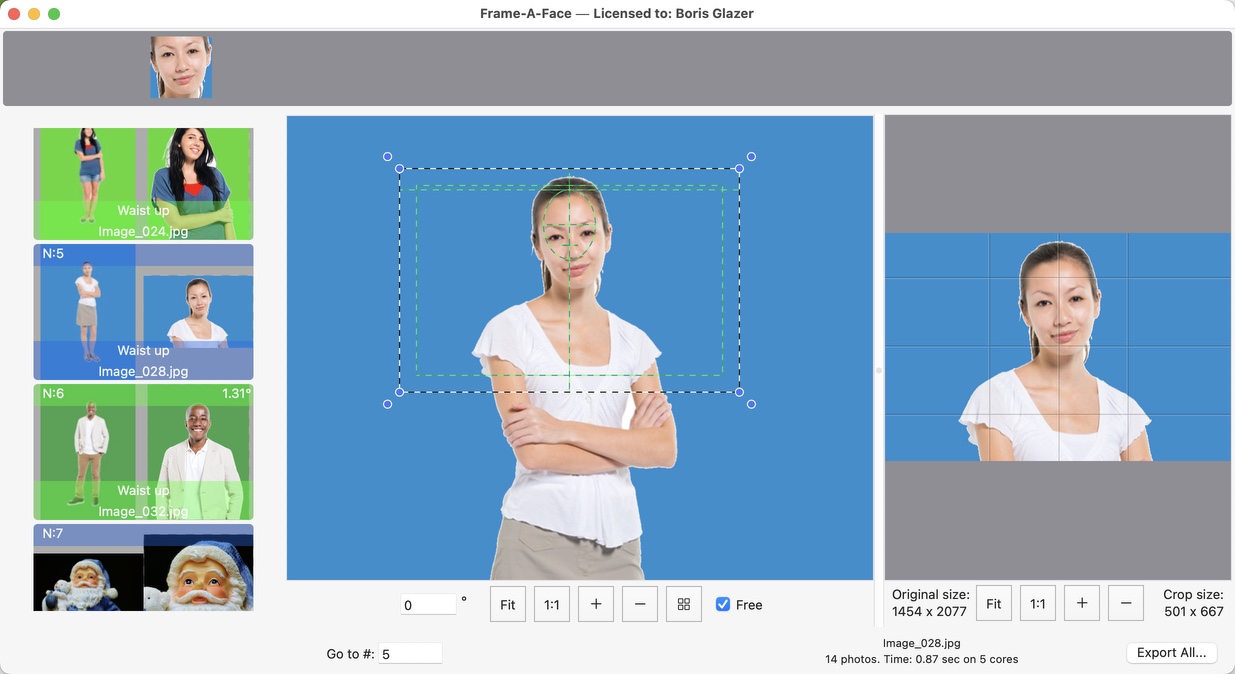
 Free - Check this to resize the crop box in free mode. In the screenshot below, the crop for a single image is changed to landscape proportions, while other pictures are cropped in portrait mode. The image has a blue color Custom Crop status.
The following are helper controls:
 Fit To View - Displays the entire picture fitted to the view panel.
 100% - Displays the image in its original pixel size.

 Zoom In / Zoom Out
 Zoom to Selection - Zooms in to fit the selected crop area to the view panel.
Click and drag the mouse with the Shift key pressed to move the image inside the viewport.
 Go-To - Shows the list number of the selected image. Enter the number of the image you want to view here.