Frame-A-Face is designed to make batch portrait cropping fast and consistent. It detects faces locally on your computer and automatically positions the crop for each image.
The basic workflow is simple: load your images, set the crop you want, apply it to the batch, review the results, and export.
1. Load Images
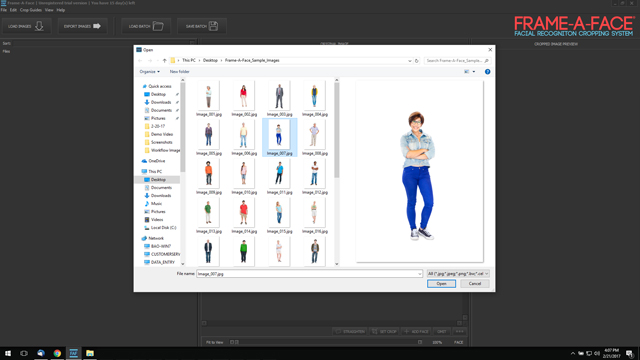
After Frame-A-Face launches, click “Load Images” and select the folder containing your photographs. Select all the images you want to process.
2. Check Face Detection and Set the Master Crop
After the images are loaded, Frame-A-Face automatically detects faces.
If necessary, use the “No faces or multiple faces detected” filter to find images that need attention. You can add or remove face boxes manually and then return to “All Images.”
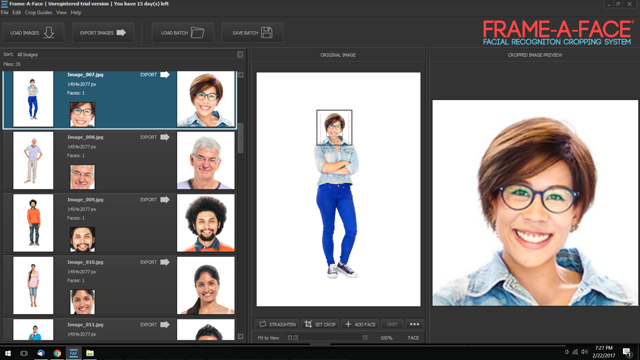
Choose an image that represents the batch well — for example, one with a centered subject and suitable headroom. Click “Set Crop” in the original image preview.
Set the crop dimensions and adjust the crop box as needed. This becomes the master crop for the batch.
Click “Apply Crop to All Images.”
3. Review Crops and Export
Review the automatically positioned crops before exporting.
Most images can be checked with a quick glance. If an individual crop needs adjustment, you can correct it directly in the preview. An individual adjustment affects only that image.
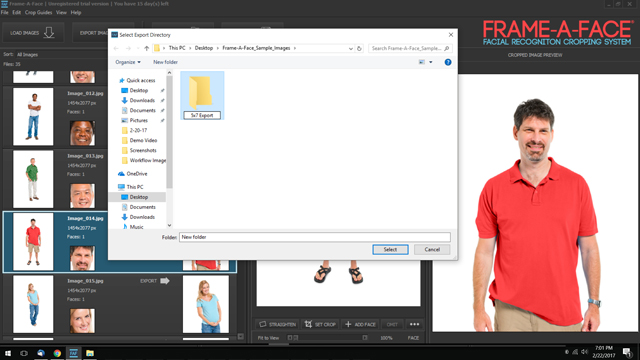
When the batch is ready, click “Export Images.” Choose where to save the images, and Frame-A-Face will export the cropped files.
4. Create Another Crop
The same batch can be used to create different crop formats.
After exporting the first crop, return to the image used for the master crop. Click “Set Crop”, change the dimensions — for example, to 1:1 for ID cards — and adjust the crop box.
Click “Apply Crop to All Images” again, review the new crops, and export the second version.
Finished!
You can create multiple sets of consistently cropped images from the same original photographs without repeating the entire process.
For example, one batch can be prepared for printing and then quickly converted to another format for ID cards or other uses.
Below, you will find videos and screen shots of the easy-to-use interface as well as direct workflow application of the software.

After Frame-A-Face launches, click the “Load Images” button. Browse to the folder containing your photographs and select all the images you want to process. You can use the “Ctrl” key + “A” key to select all images in the folder.

Choose an image from the image tiles that is representative of the batch. For example, choose one with a centered subject and good headroom. Click the “Set Crop” button in the original image preview pane. This will be the master crop for the batch. Set the crop dimensions and use the controls to position the crop box. When ready, click the “Apply Crop to All Images” button.

Scroll through your batch to review the automatically positioned crops. Most images can be checked at a glance. If an individual crop needs adjustment, you can make the correction in the preview panel. Adjustments made here apply only to the selected image and do not change the crop for the rest of the batch. When your batch is ready, click the “Export Images” button. Choose where to save the images and Frame-A-Face will export the cropped files.

Frame-A-Face can quickly create another crop from the same batch. After exporting your first set of cropped images, select an image to use as the next master crop. Click the “Set Crop” button and change the dimensions, for example to 1:1 for ID cards. Adjust the crop box around the face as needed, then click “Apply Crop to All Images.”
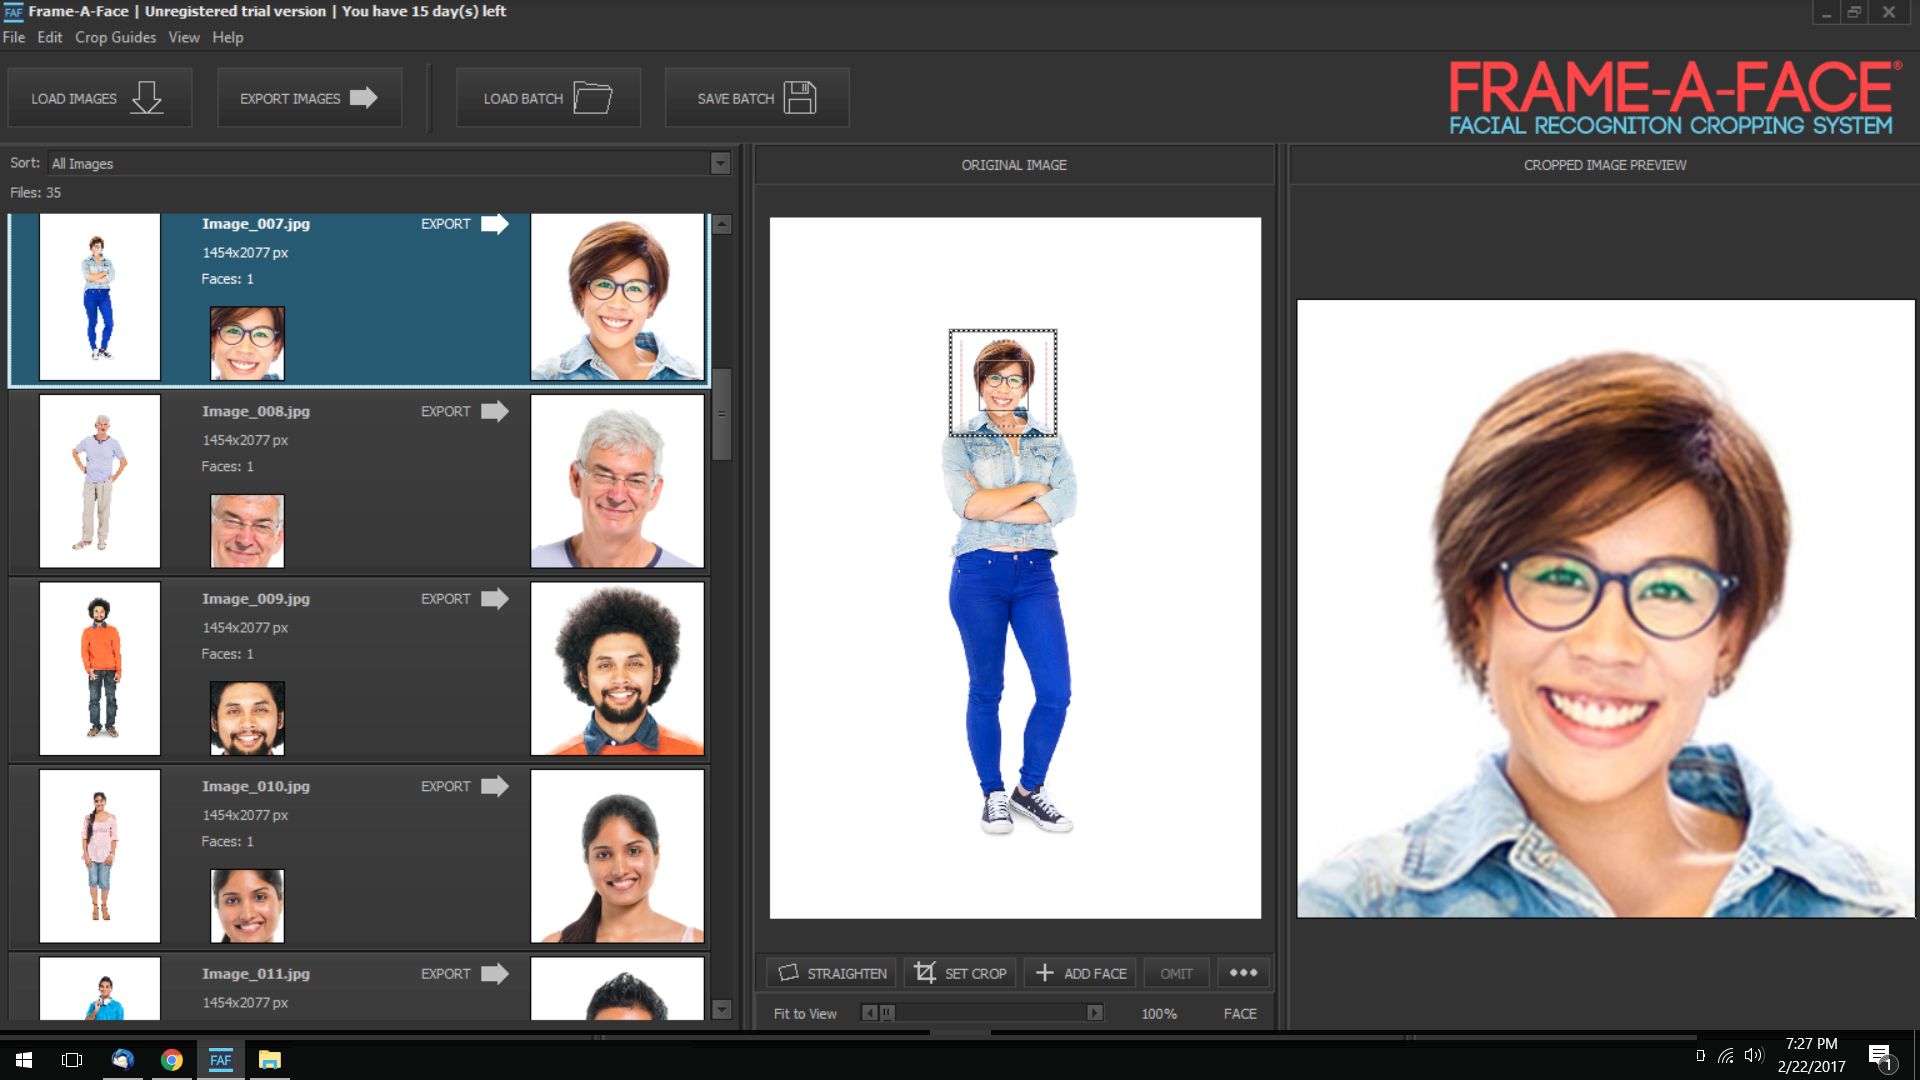
Scroll through the image tiles and review the new crop, such as the head-and-shoulders format for ID cards. Make individual adjustments as needed. When you are satisfied with the crop placement, click the “Export Images” button. Frame-A-Face will then save the entire batch with the new crop format.

Your images are now ready! In a matter of minutes, you can create two folders, each containing a different set of cropped images. One set can be prepared for printing and customer orders, while the second set can be used to create ID cards or other documents.
By using Frame-A-Face to automate the repetitive cropping work, you save time and keep the framing consistent across the entire batch.
Frame-A-Face Overview Video
See the complete Frame-A-Face workflow, from loading a batch of images to reviewing and exporting the finished crops.
Frame-A-Face Advanced Features
This video covers additional features such as crop presets and export templates designed to make batch image processing more efficient.
For a limited time, purchase the Frame-A-Face cropping system for only $229.00 This software will revolutionize your digital portrait workflow, saving time and money. Not convinced? Try the full version of Frame-A-Face free for 15 days.
Contact us by email. We normally reply within one business day.
Email: info@frameaface.com